
- Connect a USB device to Virtual USB server appliance.
- Start the Virtual USB client software.
- In the client software’s GUI:
- The Virtual USB server appliance will be automatically listed under “USB Hubs” as CloudHub after 20 seconds.
- The USB device connected will appear under the CloudHub.
- Right click on the USB device that appears and select “Use” to use the device.
- You can now access the USB device remotely as if it is directly connected to your notebook.

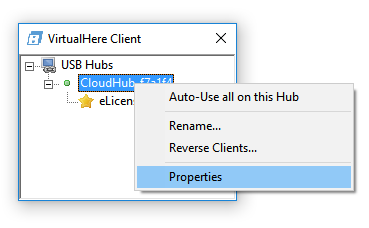
- The Virtual USB Server appliance can be configured as standalone or as part of the network.
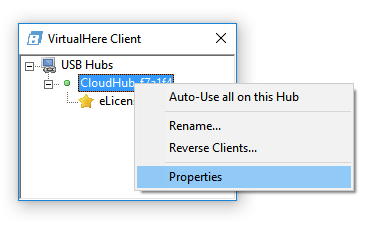
- To manage the Virtual USB Server, right click on the Virtual USB Server and select Properties.
- Click on the “Configure” button and enter the password cloudhub66 to access the configuration interface.
- To configure as standalone network device:
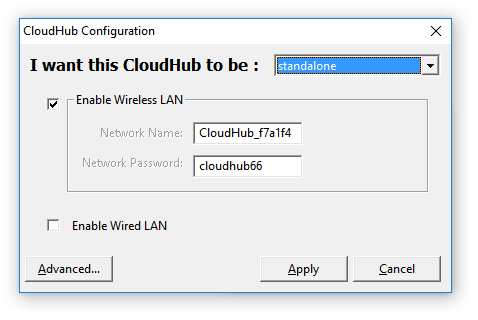
- Select “standalone” to configure Virtual USB server appliance as a standalone device.
- Check “Enable Wireless LAN” to enable the wireless adapter and assign its SSID and password.
- Check “Enable Wired LAN” to enable the Ethernet adapter.
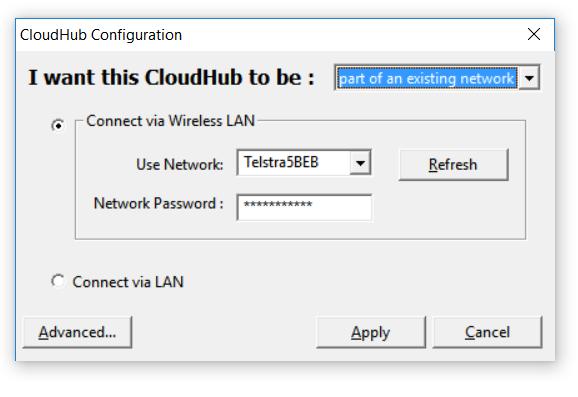
- To configure the Virtual USB Server as part of an existing network:
Select “Connect via LAN” or “Connect via LAN” to connect using the wireless or Ethernet adapter. - Reset:
There is a reset button beside the LAN port. If the Virtual USB Server appliance is unreachable, you can reset the device by using a pin to press the reset button for 10 seconds, and power off and power on again.
- Follow the following steps to generate the server log for troubleshooting purposes.
- From the client software, right click on the Virtual USB Server and select Properties.
- Click on the “Configure” button and enter the password cloudhub66 to access the configuration interface.
- Click on “Advanced…” button at the bottom right and select “Save Server Log” to save the server log.
- Send the server log to our support team for analysis.
- Follow the following steps to update the firmware of Virtual USB Server upon the advice of our technical team.
- From the client software, right click on the Virtual USB Server and select Properties.
- Click on the “Configure” button and enter the password cloudhub66 to access the configuration interface.
- Click on “Advanced…” button at the bottom right and select “Update Firmware…”.
- Select the firmware file provided and click “Open” and confirm to update the firmware.
- The Virtual USB Server will automatically reboot upon successful firmware update.